Use Pegasus on Terra Notebook
You need to first have a Terra account.
1. Start Notebook Runtime on Terra
The first time when you use Terra notebook, you need to create a runtime environment.
On top-right panel of your workspace, click the following button within red circle:

Then you’ll need to set the configuration of your runtime environment in the pop-out dialog (see image below):
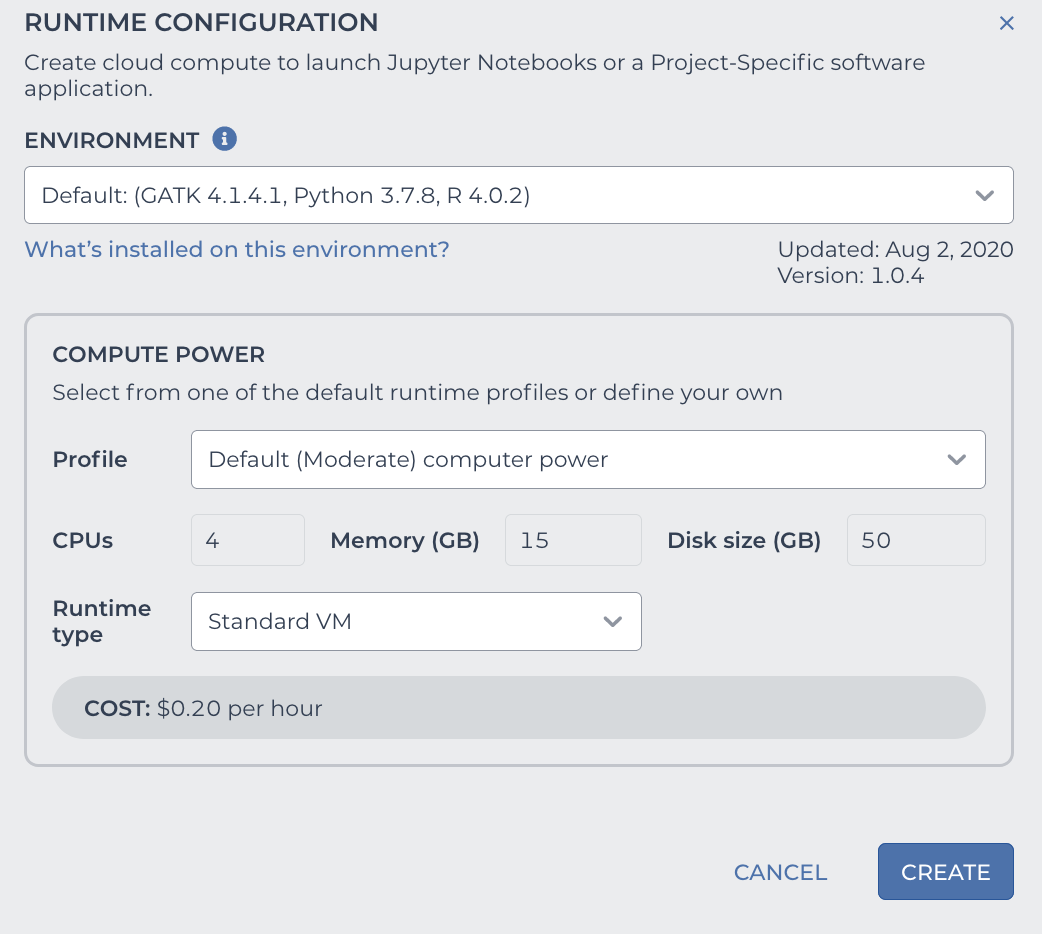
There are 2 ways of creating a runtime environment for Pegasus.
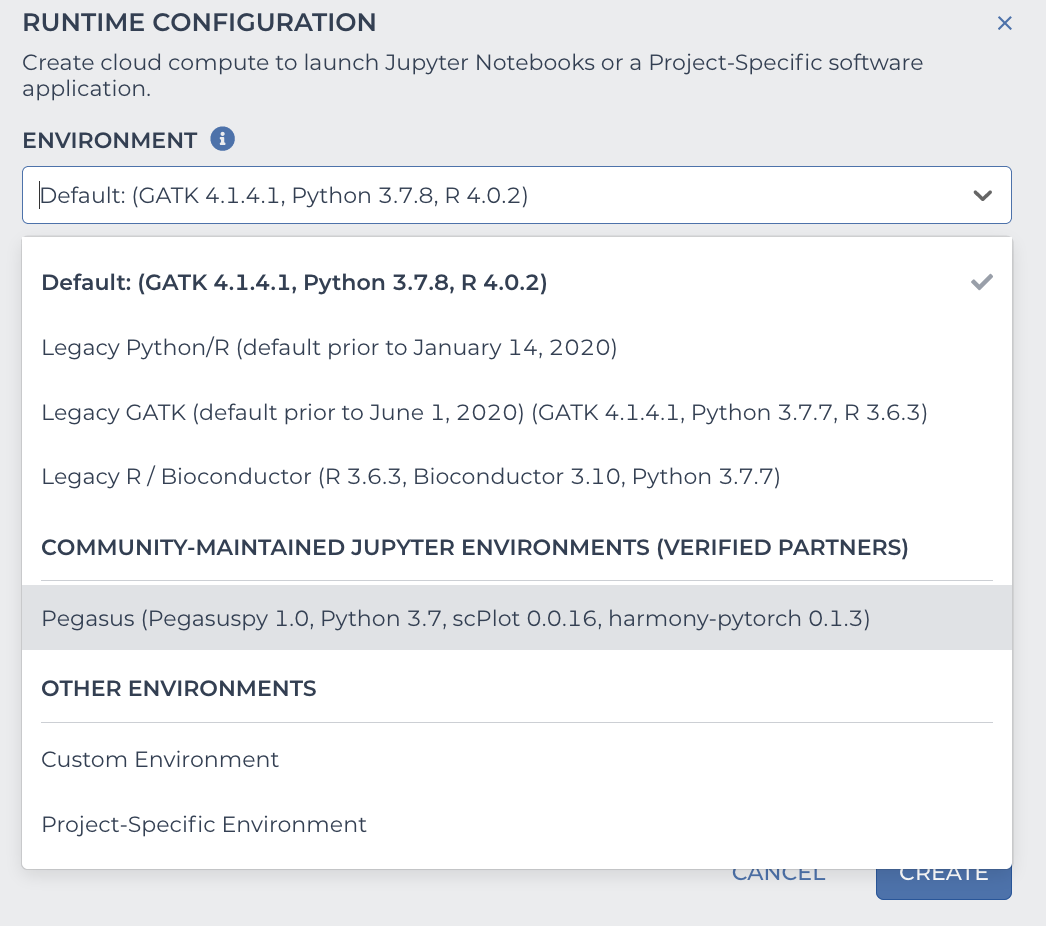
1.1. Create from Terra official environment
Terra maintains a list of runtimes for users to quickly create an environment.
In ENVIRONMENT field, select Pegasus from the drop-down menu:
After that set other fields in the pop-out dialog:
In Runtime type field, choose
Standard VM(see the third red rectangle above), as this is the cheapest type and is enough to use Pegasus.In COMPUTE POWER field, you can set the computing resources you want to use.
Now click CREATE button to start the creation. After waiting for 1-2 minutes, your runtime environment will be ready to use, and it’s started automatically.
In this way, you can create your environment with the most updated version of Pegasus.
1.2. Create from custom environment
Another is to create your environment directly from Pegasus docker image which is maintained by Cumulus team. If you want to use an older version of Pegasus, this is way to create your environment.
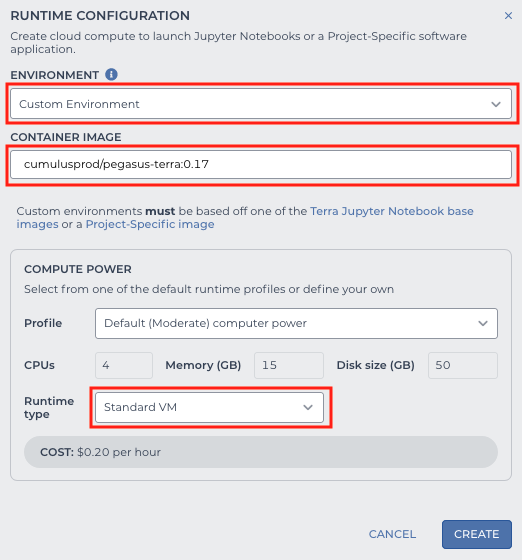
In ENVIRONMENT field, choose
Custom Environment(see the first red rectangle above).In CONTAINER IMAGE field, type
cumulusprod/pegasus-terra:<version>(see the second red rectangle above), where<version>should be chosen from this list. All the tags are for different versions of Pegasus.In Runtime type field, choose
Standard VM(see the third red rectangle above), as this is the cheapest type and is enough to use Pegasus.In COMPUTE POWER field, you can set the computing resources you want to use.
Note
Sometimes DockerHub server may go down. In this situation, we also provide backup docker images on RedHat docker registry. Simply type quay.io/cumulus/pegasus-terra:<version> in CONTAINER IMAGE field.
Now click CREATE button to start the creation. After waiting for 1-2 minutes, your runtime environment will be ready to use, and it’s started automatically.
1.3. Start an environment already created
After creation, this runtime environment is associated with your workspace. You can start the same environment anytime in your workspace by clicking the following button within red circle on top-right panel:

2. Create Your Terra Notebook
In NOTEBOOKS tab of your workspace, you can either create a blank notebook, or upload your local notebook. After creation, click EDIT button to enter the edit mode, and Terra will automatically start your notebook runtime.
When the start-up is done, you can type the following code in notebook to check if Pegasus can be loaded and if it’s the correct version you want to use:
import pegasus as pg
pg.__version__
3. Load Data into Runtime
To use your data on cloud (i.e. in the Google Bucket of your workspace), you should copy it into your notebook runtime by Google Cloud SDK:
!gsutil -m cp gs://link-to-count-matrix .
where gs://link-to-count-matrix is the Google Bucket URL to your count matrix data file.
After that, you can use Pegasus function to load it into memory.
Please refer to tutorials for how to use Pegasus on Terra notebook.
4. Stop Notebook Runtime
When you are done with interactive analysis, don’t forget to stop your notebook runtime by clicking the following button of the top-right panel of your workspace within red circle:

Otherwise, Google Cloud will keep on charging you.